

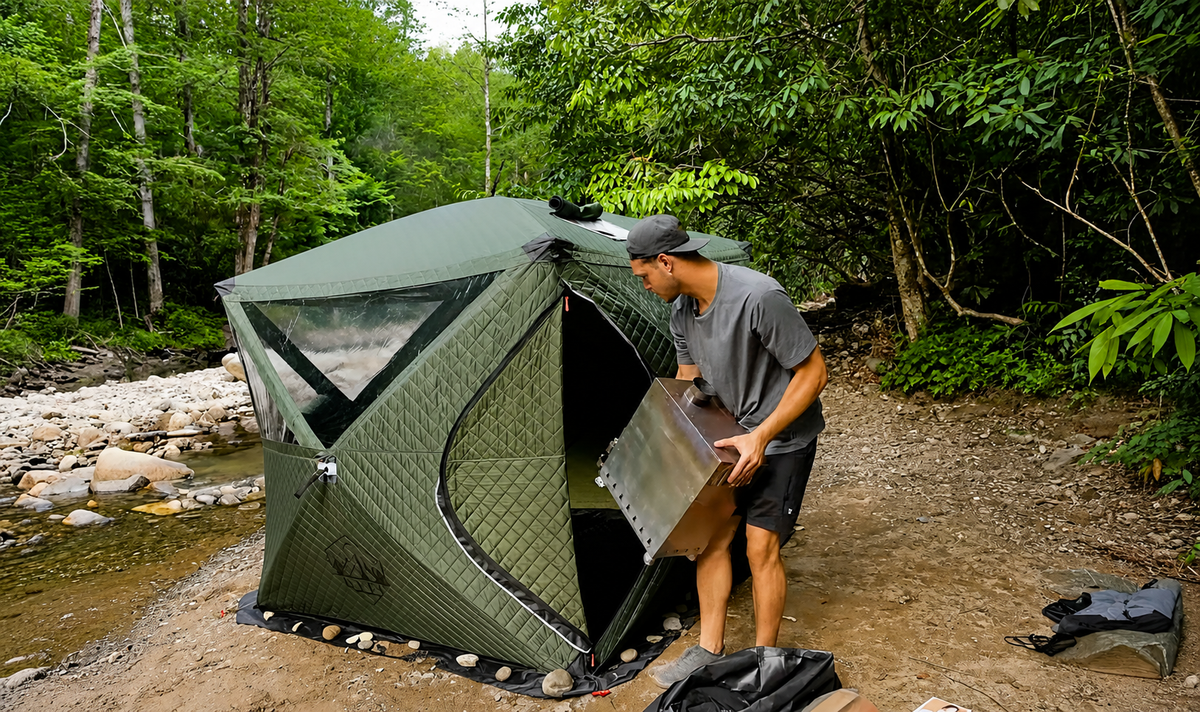
How to Set Up a Sauna Tent
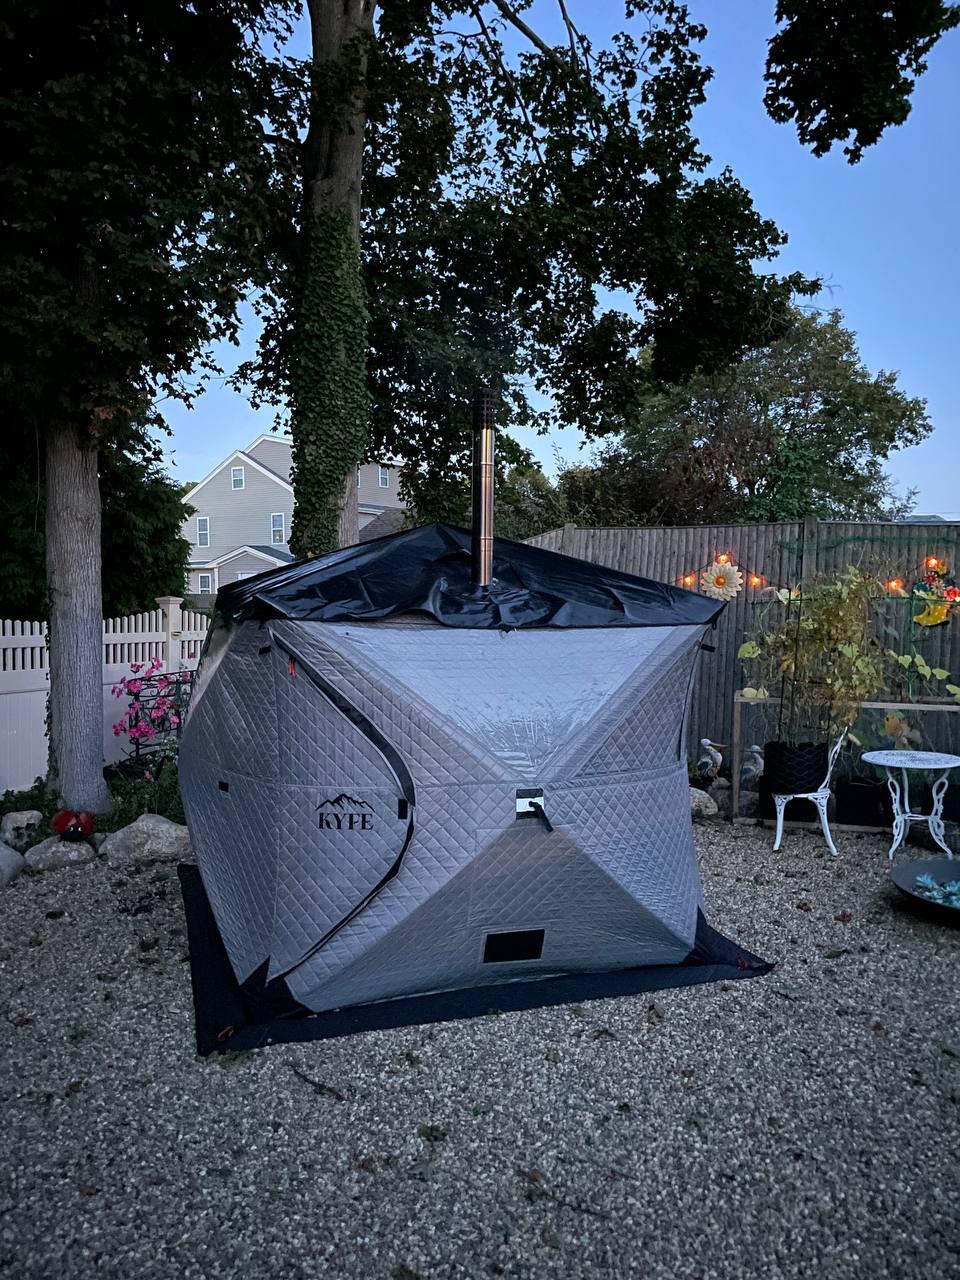
The KYFE Portable Sauna Tent sets up in 15 minutes on any flat outdoor surface. Backyard, campsite, lakeside, snow — the sequence is the same every time. This guide walks through every step from unpacking to your first pour of water on hot rocks, including the details that catch first-time owners off guard.
If you're a visual learner, KYFE has a full video walkthrough of the complete sauna setup and a separate furnace setup and break-in guide on YouTube. Both are worth watching before your first session. The written guide below covers everything in the same order.
What You'll Need Before You Start
Everything required for your first session ships in the KYFE kit. The fire poker, gloves, screwdriver, air intake knob, and thermometer are stored inside the furnace ashtray — check there first before assuming anything is missing.
Before starting, confirm you have:
- KYFE tent structure with integrated floor skirt
- Wood-burning furnace with glass fire door and folding legs
- Rock cage and volcanic sauna stones
- Chimney sections and clamps
- Heat-resistant gloves, fire poker, and thermometer
- Dry hardwood — oak, ash, maple, or hickory
The one thing you need to source separately is firewood. Kiln-dried hardwood is the right choice. Clean logs with the bark removed produce almost no smoke — bark is the primary source of smoke in a wood-fired sauna. Wet or green wood is the most common reason first sessions underperform. If the fire is struggling and the tent is filling with smoke, the wood is almost always the issue, not the furnace.
Step 1: Choose Your Location
Pick a flat, level surface with at least two feet of clearance around the tent on all sides — more around the chimney exit point. Grass, packed dirt, gravel, snow, and concrete all work. Avoid:
- Overhanging branches or structures near the chimney
- Surfaces that slope more than a few degrees — the furnace must sit level
- Dry leaves or debris that could catch an ember
- Areas where water pools after rain
Wind direction matters more than most buyers expect. Position the tent so the door faces away from the prevailing wind. This keeps smoke away from the entrance and prevents cold air from rushing in during the session. The chimney should vent into open air, not toward a structure, fence, or tree line.
On wood decking, place a fireproof mat under the furnace footprint as a precaution. On every other surface, the KYFE's integrated floor skirt handles ground protection directly.
Step 2: Unpack and Inventory the Kit
Before assembling anything, lay out every component and confirm nothing is missing. On your first setup this takes three minutes and prevents a frustrating mid-assembly discovery. Remember — accessories are packed inside the furnace ashtray, so open that first.
On subsequent setups you'll move through this in under a minute. You'll know the kit by feel.
Step 3: Assemble the Tent Frame
Spread the tent flat on your chosen surface, centered exactly where you want it to sit. The frame system is designed for one-person assembly — no second set of hands needed.
Once the frame is extended and the tent is standing, check that the floor skirt lies flat against the ground on all sides. If the skirt is lifting at any corner, the surface is slightly uneven — adjust position before continuing. A lifted skirt loses heat at ground level, which is the single biggest factor in how quickly the tent climbs to temperature.
Stake the tent at the corner anchor points before doing anything else. In calm conditions this is precautionary. In any meaningful wind, staking is not optional — an unstaked tent with a lit furnace inside is a hazard.
Step 4: Break In the Furnace (First Use Only)
If this is your first time using the KYFE, the furnace needs to be broken in before its first session inside the tent. This is a one-time step that burns off any protective coatings on the metal and cures the firebox properly. Skip it and your first session will smell like a factory rather than a sauna.
The full break-in process is covered in KYFE's furnace setup and break-in video — watch it before lighting anything for the first time. The short version: take the furnace outside the tent, light a small fire, and let it burn through one full load of wood. Once it's cooled, it's ready to use inside.
Step 5: Install the Furnace
Unfold the furnace legs and place the furnace in the center rear of the tent, away from the door and clear of the seating area. The furnace sits directly on the integrated fireproof floor section — not on a bench, not on any raised surface, and not on any part of the tent fabric that isn't designated for furnace contact.
The glass fire door should face toward the tent entrance so you can manage the fire without reaching past the stove body. Confirm all four legs are fully extended and sitting flat. A furnace that rocks or tips is a serious safety issue — if the surface beneath it is uneven, pack something flat under the short leg before continuing.
Step 6: Assemble and Install the Chimney
Connect the chimney sections starting at the furnace collar and working upward. Each section should fit snugly into the next. Tighten clamps at every joint — a loose chimney section that separates during a session lets smoke into the tent.
Route the assembled chimney through the roof vent opening. The chimney should exit cleanly through the vent without touching the tent fabric at the exit point. If the chimney is making contact with the fabric, the assembly is misaligned — adjust until there's clear separation between the hot metal and the tent material at the roof.
Attach the chimney cap at the top. The cap prevents rain, debris, and downdraft from entering the chimney. In strong wind, a downdraft pushes smoke back down and into the tent — the cap significantly reduces this.
Step 7: Load the Rock Cage
Place the rock cage on top of the furnace firebox. Load the volcanic sauna stones into the cage — larger stones toward the bottom for stability, smaller stones toward the top to maximize steam surface area.
For your first session, fill the cage completely. A full load takes slightly longer to reach temperature but holds heat longer and produces more consistent steam throughout the session.
Only use the volcanic stones included with the KYFE kit or replacement stones specified for sauna use. Never use river rocks or any stone that has been submerged in water — moisture trapped inside expands rapidly under heat and can cause the stone to crack or fracture.
Step 8: Set Up Benches and Accessories
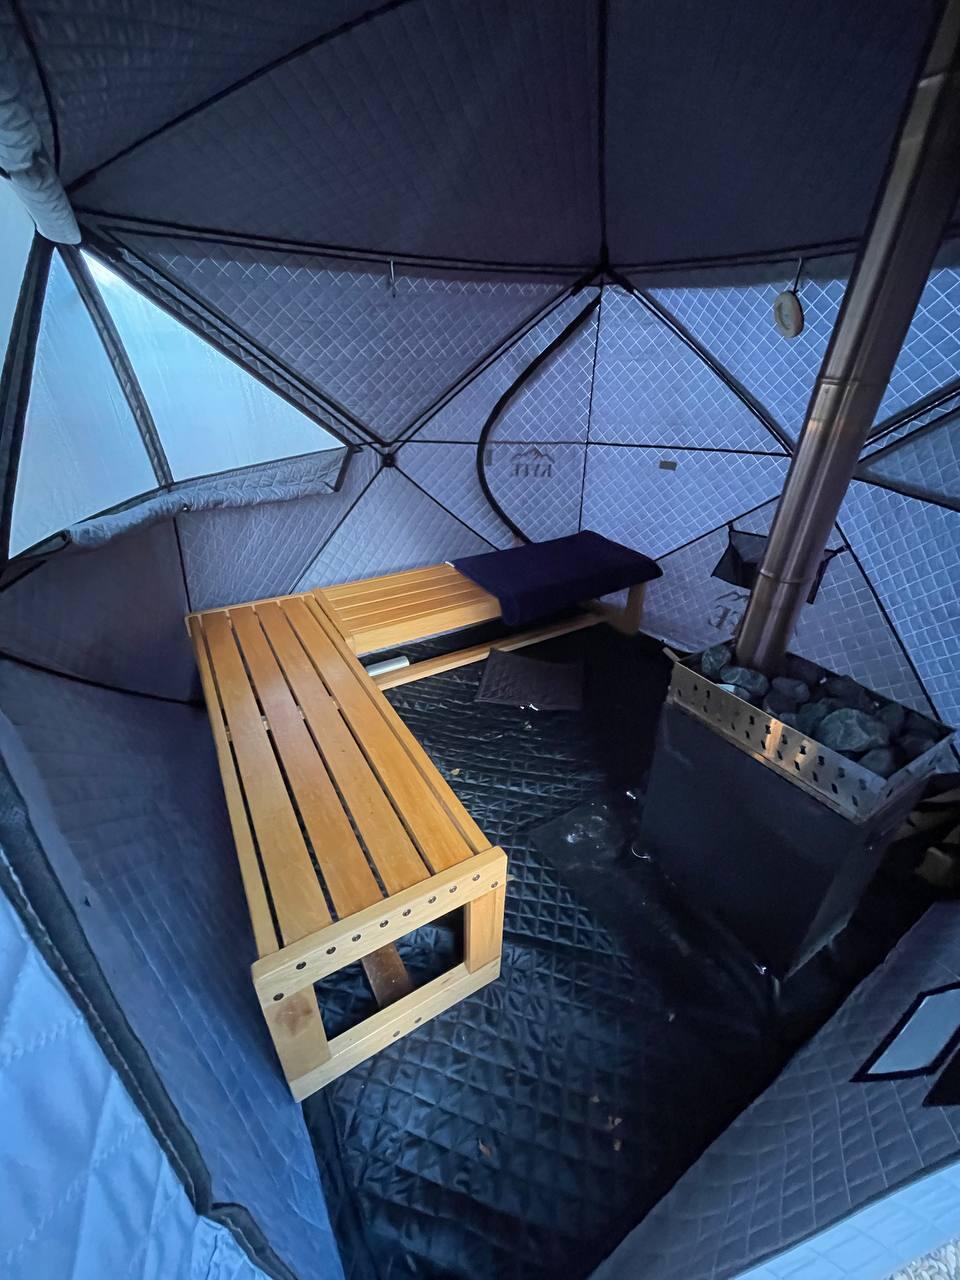
Place benches inside the tent before lighting the fire — it's significantly harder to arrange the interior once heat is building. Position benches so that anyone seated is clear of the furnace and chimney by at least 18 inches on all sides.
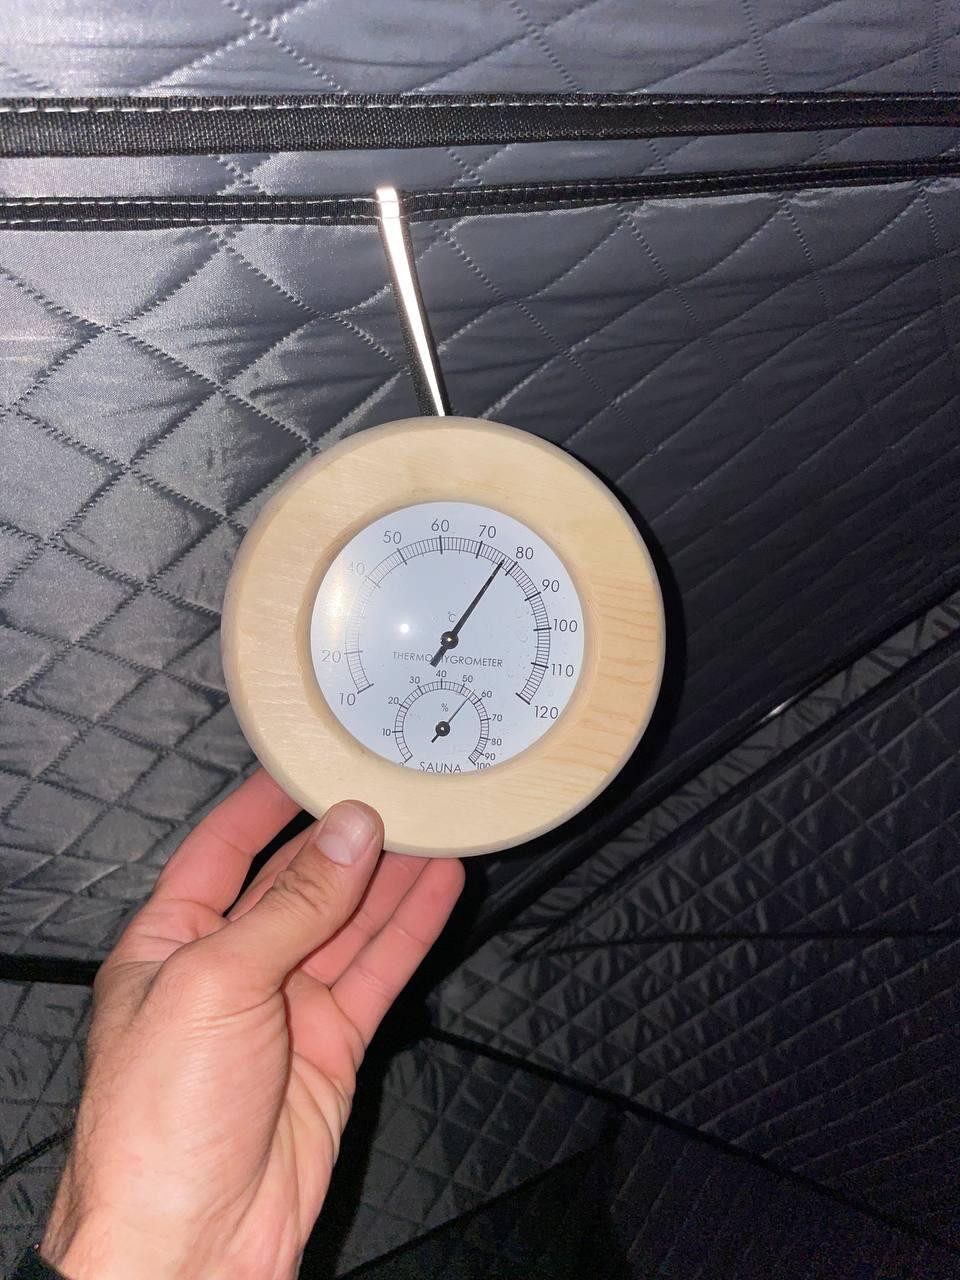
Mount the thermometer on the wall at bench height. This is the temperature that matters. A thermometer near the ceiling will read 40–60°F higher than the temperature at sitting level, which creates a misleading picture of the actual session environment.
Get your water bucket and ladle within reach of the bench. Have the cold plunge filled and positioned outside before you light the fire. You won't want to deal with it once the session has started.
Step 9: Light the Fire
Open the furnace door and build a small fire base using dry kindling and two to three pieces of split hardwood. Light the kindling and leave the door slightly ajar for the first few minutes to establish draft. A strong initial draft pulls combustion gases up and out through the chimney efficiently — seal the door too early and the fire smolders rather than catching cleanly.
Once the fire is established and drawing well, close the furnace door and set the air intake damper to a medium position. The damper controls oxygen reaching the fire — more air means faster, hotter combustion; less air means a slower, more sustained burn. During the heating phase, keep the damper open and add wood every 8–10 minutes to build heat steadily.
The interior will reach usable sauna temperature around 160°F in approximately 20 minutes from a well-built fire. The KYFE reaches 200°F in under 30 minutes with dry hardwood and a fully loaded rock cage. Watch the thermometer rather than guessing — the rocks need to be fully saturated with heat before your first pour produces real steam.
Step 10: Your First Pour
When the thermometer reads above 180°F and the rocks have been heating for at least 20 minutes, you're ready. Using the ladle, pour a small amount of water — roughly a quarter cup — directly onto the center of the rock pile. The rocks should produce an immediate, full burst of steam. If the steam is thin or the water runs off without vaporizing, the rocks need more time.
This is löyly — the defining element of the wood-fired sauna experience and the reason a wood-fired setup produces something fundamentally different from an infrared panel or electric steam tent. Pour small amounts every five to ten minutes rather than one large pour. Frequent small pours maintain rock temperature and keep the steam consistent. A single large pour spikes humidity but drops rock temperature fast.
Add a few drops of eucalyptus oil or birch extract to the water bucket for aromatherapy. The heat amplifies scent significantly — a little goes a long way.
For everything there is to know about generating the best possible steam, see our complete löyly guide.
Packing Down After the Session
Let the fire burn down completely — do not pour water on it to extinguish it. This damages the firebox and creates a steam hazard inside a confined space. Let the wood burn through naturally and the furnace cool until you can touch it safely with bare hands.
Disassemble the chimney from the top down. Remove the rock cage and furnace — rocks hold heat for a long time after the fire is out, so keep gloves on. Collapse the tent frame, fold the tent body, and pack everything back into the travel bag.
Full breakdown takes 10–15 minutes. Everything fits into a single travel bag that fits in a truck bed or SUV cargo area.
Common Mistakes to Avoid
Burning wood with bark on it. Bark is the primary source of smoke in a wood-fired sauna. Debark your logs or buy split hardwood that's already clean. The difference in smoke output is significant.
Skipping the furnace break-in. A new furnace used without the outdoor burn-in produces off-gassing that ruins the first session. Watch the break-in video and do this step before your first session inside the tent.
Not staking the tent. In any wind, an unstaked tent with a live fire inside is dangerous. Always stake before lighting.
Pouring too much water at once. Large pours cool the rocks fast and flood the tent with humidity. Small, controlled pours maintain temperature and produce a better experience throughout the session.
Reading temperature at ceiling height. Mount the thermometer at bench level. Ceiling temperature runs significantly higher than where you're actually sitting.
Setting up on uneven ground. A tilted furnace is a safety risk and produces uneven heating. If your surface is uneven, adjust position before lighting.
Frequently Asked Questions
How long does setup take?
Around 15 minutes from unpacking to lit fire, including the furnace break-in on first use. Subsequent setups run closer to 10 minutes once you know the sequence.
Can one person set up the KYFE alone?
Yes. The frame and furnace installation are both designed for single-person setup.
Do I need a permit?
In most US locations, no. A portable structure with no permanent foundation doesn't typically require a permit. Check local fire codes regarding open flame use, particularly during seasonal burn restrictions.
How do I control the temperature?
The primary control is the air intake damper on the furnace. Open it wider to increase heat output; close it partially to reduce. The tent door can also be cracked slightly if the interior climbs above your target temperature.
Can I leave the tent set up permanently?
Yes. The KYFE is built for extended outdoor exposure. In sustained high winds or severe weather, pack it down or add additional ground anchors.
What if the chimney smokes inside the tent?
Check that the chimney cap is in place and all sections are tightly clamped. If the issue continues, the fire may not have fully established draft — open the furnace door slightly to assist airflow until the chimney draws consistently.
What wood works best?
Dry hardwoods with bark removed — oak, ash, maple, hickory. For a full breakdown of wood selection and preparation, see our guide on what wood to burn in a sauna.
Qu'est-ce qu'une tente de sauna ? Le guide complet des saunas portables à bois
How to Choose a Sauna Tent: What Actually Matters